When it comes to expanding your online presence, adding another domain to your GoDaddy hosting account can help you create a more versatile and diverse web presence. Did you know that you can easily add multiple domains to your existing GoDaddy hosting account? This means you can manage multiple websites from one central location, simplifying your online operations and enhancing your brand’s visibility.
Adding another domain to your GoDaddy hosting account is a seamless process that allows you to scale your online presence effectively. By adding multiple domains, you can cater to different target audiences, offer specialized services or products, and strengthen your overall brand presence. With GoDaddy’s user-friendly interface, you can easily manage all your domains, including their DNS settings, email accounts, and website files. By consolidating your domains under one hosting account, you can simplify your website management tasks and efficiently allocate your digital resources.
To add another domain to your GoDaddy hosting account, follow these steps:
- Login to your GoDaddy account.
- Navigate to the “My Products” section.
- Select “Hosting” and choose the hosting plan you want to add the domain to.
- Under the “Settings” tab, click on “Add Domain.”
- Enter the new domain name and follow the prompts to complete the setup.

Adding Another Domain to Godaddy Hosting Account
If you have a Godaddy Hosting Account and want to add another domain to it, you’re in the right place. Adding another domain to your Godaddy Hosting Account is a straightforward process that can be done with just a few simple steps. Whether you want to create a new website or add a domain as an add-on to an existing site, Godaddy provides the necessary tools and features to help you manage multiple domains in one hosting account.
Before we dive into the steps of adding another domain to your Godaddy Hosting Account, let’s briefly discuss the benefits of having multiple domains under one hosting account. By consolidating your domains, you can easily manage and organize all your websites in one place, saving time and effort. Additionally, having multiple domains allows you to expand your online presence, target different audiences or niches, and increase your brand visibility.
Now, let’s explore the process of adding another domain to your Godaddy Hosting Account.
To begin with, log in to your Godaddy account and navigate to the Hosting section. Click on the “Manage” button next to the hosting account to which you want to add another domain.
Step 1: Accessing the Hosting Account
Once you’re in the Hosting section, locate the hosting account to which you want to add another domain. Click on the “Manage” button next to that hosting account.
This will take you to the control panel of your hosting account where you can manage all the domains, files, databases, and other features related to your hosting.
Once you are in the control panel, you can easily navigate to the section where you can manage domains.
Step 2: Adding the Domain
In the control panel, locate the section called “Domain Management” or “Domains.” This section provides all the necessary tools and features to manage your domains within the hosting account.
Click on the option to “Add Domain” or “Add Domain Name” to initiate the process of adding another domain to your hosting account.
This will open a form where you can enter the domain name you want to add. Make sure to enter the domain name correctly without any typos. Double-check the spelling and ensure you have entered the complete domain name (e.g., example.com).
If you already own the domain, select the option to “I already own this domain.” If you want to register a new domain, select the option to “Register a new domain.” Keep in mind that registering a new domain may incur additional costs.
Step 3: Configuring the Domain
After entering the domain name, you will have the option to configure the domain settings. This includes selecting the hosting plan, setting up a document root directory, and configuring the domain’s DNS settings.
If you have multiple hosting plans, choose the appropriate plan for your new domain. For the document root directory, you can either create a new directory specifically for the domain or select an existing directory where you want the domain files to be stored. It’s recommended to choose a descriptive and easily recognizable directory name to keep your files organized.
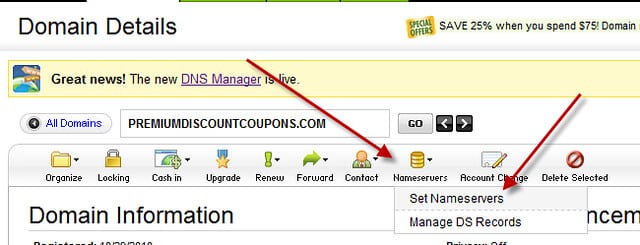
When it comes to DNS settings, you have a few options. If you want to use Godaddy’s default nameservers, select the option to “Use Godaddy default nameservers.” This is the simplest option as Godaddy will automatically manage the DNS settings for your domain.
If you prefer to use custom nameservers or point the domain to a different hosting provider, select the option to “Use custom nameservers” or “I’ll update my nameservers myself.” This will allow you to specify the custom nameservers or update the nameservers later.
Step 4: Completing the Setup
Once you have configured the domain settings, review the information you have entered. Make sure all the details are correct before proceeding.
After reviewing, click on the button to “Add Domain” or “Finish” to complete the setup and add the domain to your hosting account.
Depending on the domain’s DNS propagation, it may take some time for the changes to take effect. This is normal and can take up to 48 hours. During this time, you can start building your website or making any necessary configurations.
Managing Multiple Domains in Godaddy Hosting Account
Now that you have successfully added another domain to your Godaddy Hosting Account, let’s talk about how to manage multiple domains within the account.
In your hosting account control panel, you will find various tools and features that allow you to manage each domain individually. You can:
- View and manage the files and folders associated with each domain.
- Access the domain’s database and make necessary changes or updates.
- Install and manage CMS platforms (e.g., WordPress, Joomla) for each domain.
- Set up email accounts and manage email forwarding for each domain.
- Monitor and analyze website performance, traffic, and security for each domain.
By using these tools and features effectively, you can ensure the smooth operation and management of all your domains within your Godaddy Hosting Account.
In Conclusion
Adding another domain to your Godaddy Hosting Account is a simple process that can be done using the steps outlined above. Remember to choose a domain name that aligns with your brand or website’s purpose and configure the domain settings accordingly. By managing multiple domains within your Godaddy Hosting Account, you can streamline your online presence and easily oversee all your websites from one centralized location.
If you need further assistance or have any questions, you can always refer to Godaddy’s comprehensive support documentation or reach out to their customer support team for personalized guidance.
Start expanding your online presence by adding another domain to your Godaddy Hosting Account today.
Key Takeaways: How to Add Another Domain to Godaddy Hosting Account?
- Log in to your GoDaddy account.
- Go to the “My Products” section.
- Click on “Manage All” next to Web Hosting.
- Select the hosting account you want to add a domain to.
- Click “Add Domain” and follow the prompts to complete the process.
Adding another domain to your GoDaddy hosting account is a simple process. First, log in to your GoDaddy account and navigate to the hosting control center. Then, click on the “Manage” button next to the hosting account where you want to add the domain. Next, scroll down to the “Domains” section and click on the “Add Domain” button. Enter the domain name you want to add and follow the prompts to complete the process.
Once the domain is added, you can manage it through the same hosting control center. You can set up email accounts, install applications, and manage the domain settings. Remember to update the DNS settings of the new domain name to point to your GoDaddy hosting account for it to work properly. Adding another domain to your GoDaddy hosting account is a quick and easy way to expand your online presence.