To add a TXT record in HostGator, follow these steps:
- Log in to your HostGator account and go to the cPanel.
- Scroll down to the Domains section and click on “Advanced DNS Zone Editor.”
- Select your desired domain from the drop-down menu.
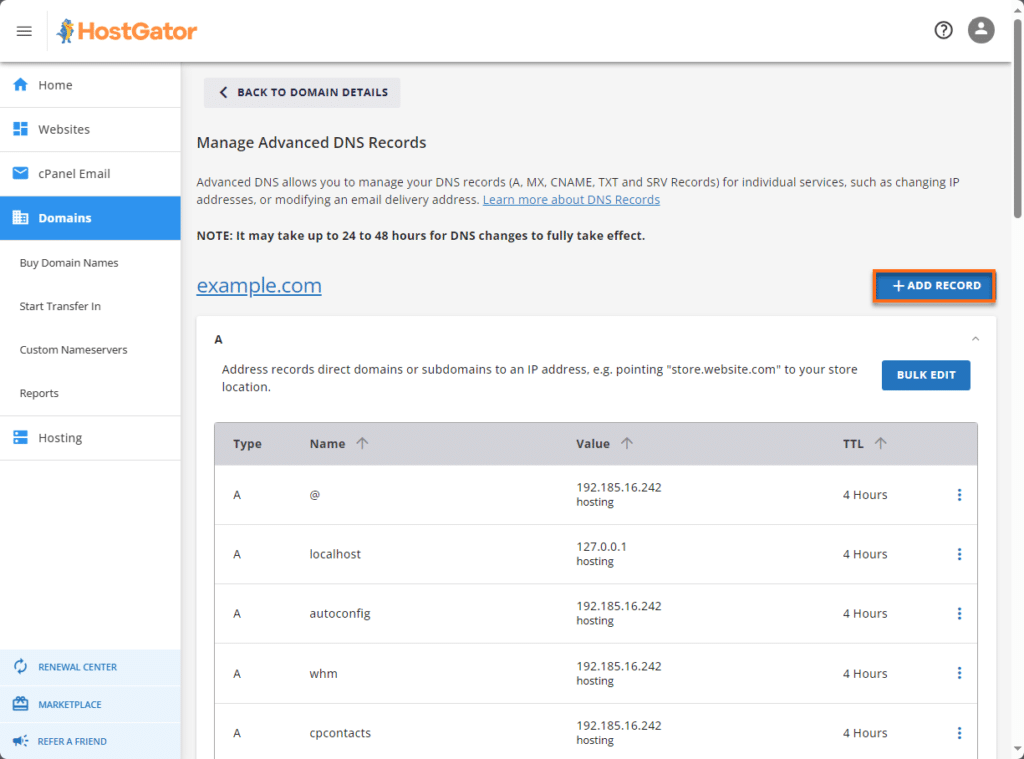
- Under the “Add DNS Record” section, enter your desired name and value for the TXT record.
- Click on the “Add Record” button to save the TXT record in HostGator.
If you’re looking to add a TXT record in HostGator, you’re in luck. This simple process allows you to easily verify your domain ownership, set up email authentication, or enhance the security of your website. With just a few steps, you’ll be able to add a TXT record and enjoy the benefits it provides. So, let’s dive into the world of TXT records and discover how to add them in HostGator.
Adding a TXT record in HostGator is a straightforward process that can be done in a matter of minutes. To begin, log in to your HostGator cPanel and navigate to the “Domains” section. From there, select “Advanced DNS Zone Editor” and locate the domain for which you want to add a TXT record. Click on “Manage” next to the domain, and you’ll see a list of existing DNS records. Scroll down to the “Add DNS Record” section, and choose “TXT” in the “Type” dropdown menu. Enter the desired information in the “Name” and “TXT Data” fields, and click on the “Add Record” button. And just like that, you’ve successfully added a TXT record in HostGator.
Introduction to Adding Txt Record in Hostgator
HostGator is a popular web hosting provider that offers reliable hosting services, domain registration, and various other features for individuals and businesses. One important aspect of managing your domain in HostGator is adding TXT records. TXT records are used for various purposes, including verifying domain ownership, setting up SPF (Sender Policy Framework) records, and more. In this article, we will guide you through the process of adding TXT records in HostGator, step by step.
Before we dive into the details of adding TXT records in HostGator, it’s important to understand the significance of TXT records and how they function. TXT records are mainly used to provide additional information about a domain to DNS servers. These records can be accessed by other servers and systems to perform specific tasks. Adding TXT records can help you authenticate your domain for email deliverability, configure SPF and DKIM for better email security, and even integrate your domain with third-party services like Google Workspace or Microsoft 365.
Now, let’s explore the process of adding TXT records in HostGator and leverage the benefits they offer.
To add a TXT record in HostGator, follow these simple steps:
1. Log in to your HostGator cPanel and navigate to the ‘Domains’ section.
2. Click on ‘Advanced DNS Zone Editor’ to access the DNS management tool.
3. Select the domain for which you want to add a TXT record.
4. Within the ‘Add a Record’ section, choose ‘TXT’ from the ‘Type’ dropdown menu.
5. Enter the information for the TXT record, including the ‘Name’ and ‘TXT Data’.
6. Click on the ‘Add Record’ button to save the TXT record.
That’s it! You have now successfully added a TXT record in HostGator.