Are you looking to create a professional website or blog using WordPress? Dreamhost is a popular web hosting provider that offers an easy and efficient way to install WordPress on their platform. With Dreamhost, you can have your WordPress site up and running in no time, without the hassle of complex installation processes.
When it comes to installing WordPress on Dreamhost, the process is straightforward. Dreamhost provides a one-click installation option, making it incredibly convenient for users to set up their WordPress site. With this feature, you can quickly get started on building your website or blog without any technical expertise required. Dreamhost’s seamless installation process ensures that you can focus on creating engaging content and growing your online presence.
Looking to install WordPress on Dreamhost? Follow these steps:
- Log in to your Dreamhost control panel.
- Click on “One-Click Installs” under the “Goodies” section.
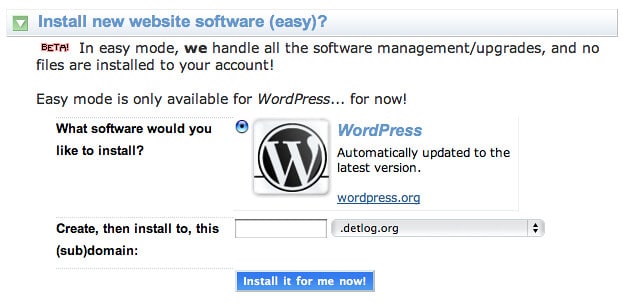
- Select “WordPress” from the list of available applications.
- Choose the domain or subdomain where you want to install WordPress.
- Specify your desired admin username and password.
- Click on the “Install it for me now!” button.
Your WordPress installation will be complete in a few moments!

Getting Started with Dreamhost
WordPress is one of the most popular content management systems (CMS) for building websites. If you’re looking to start a website or a blog, Dreamhost is a reliable and user-friendly hosting provider for WordPress. In this article, we will guide you through the process of installing WordPress on Dreamhost so that you can get your website up and running smoothly.
Before we dive into the installation process, you need to have a hosting account with Dreamhost. If you haven’t signed up yet, you can visit the Dreamhost website and choose a hosting plan that suits your needs. Dreamhost offers shared hosting, VPS hosting, and dedicated hosting options, depending on the scale of your website.
Once you have your Dreamhost account ready, you can proceed with the WordPress installation. Let’s get started!
Installing WordPress on Dreamhost
Step 1: Access the Dreamhost Control Panel
To install WordPress on Dreamhost, you first need to access the Dreamhost Control Panel, also known as the Dreamhost Web Panel. This panel is where you manage your hosting account and all its related settings.
To access the Dreamhost Control Panel, follow these steps:
- Go to the Dreamhost website and click on the “Sign In” button at the top right corner of the page
- Enter your Dreamhost username and password, and then click “Log In”
- You will now be redirected to the Dreamhost Control Panel dashboard
Once you’re logged in to the Dreamhost Control Panel, you’re ready to proceed to the next step.
Step 2: Create a New Domain or Subdomain
If you already have a domain registered with Dreamhost, you can skip this step. However, if you don’t have a domain yet or want to create a subdomain for your WordPress installation, you’ll need to create a new domain or subdomain.
Here’s how you can create a new domain or subdomain in Dreamhost:
- In the Dreamhost Control Panel, click on the “Domains” tab in the left sidebar
- Click on the “Manage Domains” option
- Click on the “Add Hosting to a Domain / Sub-Domain” button
- Enter the desired domain or subdomain name in the “Domain to Host” field
- Choose the appropriate hosting type (such as Fully Hosted or Mirrored)
- Click the “Fully Host This Domain” or “Mirror This Domain” button to complete the process
Once you have your domain or subdomain set up, you can move on to the next step.
Step 3: Install WordPress
Now that you have access to the Dreamhost Control Panel and a domain or subdomain ready, you can proceed with the actual WordPress installation:
Here’s how to install WordPress on Dreamhost:
- In the Dreamhost Control Panel, click on the “Goodies” tab in the left sidebar
- Click on the “One-Click Installs” option
- Under the “Install New CMS” section, find “WordPress” and click on the “Install this application” button
- Select the domain or subdomain from the dropdown menu where you want to install WordPress
- Leave the “Directory” field empty if you want WordPress to be installed directly on the root of your domain or subdomain
- Click the “Add an Installation” button to start the installation process
- Wait for the installation to complete, and you will see a success message
- Note down the username and password provided, as you will need them to log in to your WordPress admin dashboard
Congratulations! You have successfully installed WordPress on Dreamhost. Now, you can start customizing your website and adding content.
Configuring Your WordPress Settings
After the installation, there are a few essential settings you should configure to optimize your WordPress website on Dreamhost.
1. Permalinks
Permalinks are the URLs of your website’s pages and posts. By default, WordPress uses a structure that may not be SEO-friendly. Here’s how you can change it:
- In your WordPress admin dashboard, go to “Settings” and click on “Permalinks”
- Select the “Post name” option
- Click the “Save Changes” button to update your permalink structure
This will make your URLs more readable and search engine friendly.
2. WordPress Themes
Dreamhost offers a wide range of WordPress themes that you can use to customize the appearance of your website. To access the Dreamhost themes:
1. In your WordPress admin dashboard, go to “Appearance” and click on “Themes”
2. Browse through the available themes and click the “Activate” button for the theme you want to use
Alternatively, you can also install third-party themes by downloading them from trusted sources and uploading them to your WordPress website.
3. Plugins
Plugins add additional functionality to your WordPress website. Dreamhost supports a variety of plugins that you can install to enhance your website’s features.
To install plugins on your WordPress website:
1. In your WordPress admin dashboard, go to “Plugins” and click on “Add New”
2. Search for the desired plugin using the search bar, or browse through the featured, popular, or recommended plugins
3. Click the “Install Now” button next to the plugin you want to install
4. Once the installation is complete, click the “Activate” button to activate the plugin
Some essential plugins you may want to consider installing include a caching plugin for improved website performance, an SEO plugin for better search engine optimization, and a security plugin to protect your website from threats.
4. Website Optimization
Optimizing your website’s performance is crucial for a smooth user experience. Here are a few ways you can optimize your WordPress website on Dreamhost:
– Use a caching plugin: A caching plugin like WP Super Cache or W3 Total Cache can significantly improve your website’s speed by storing the dynamically generated HTML in a cache and serving it to visitors.
– Optimize images: Large image files can slow down your website. Use an image optimization plugin like Smush to automatically compress and optimize your images.
– Enable GZIP compression: GZIP compression reduces the size of your website’s files, allowing them to be transmitted more quickly. You can enable GZIP compression through a plugin or by modifying your .htaccess file.
By implementing these optimization techniques, you can ensure that your WordPress website performs at its best on Dreamhost.
Conclusion
Installing WordPress on Dreamhost is a straightforward process that can be completed in just a few steps. By following the instructions in this article, you can have your WordPress website up and running in no time. Remember to optimize your website’s settings, themes, and plugins to maximize its performance and functionality.
If you’re ready to get started with Dreamhost and WordPress, visit Dreamhost’s website to explore their hosting plans and sign up for an account. Happy website building!
Key Takeaways – How to Install WordPress on Dreamhost?
- Sign up for a Dreamhost account
- Access the Dreamhost control panel
- Click on “One-Click Installs” and select the WordPress option
- Enter your domain name, desired username, and password
- Click “Install it for me now” and wait for the installation to complete
To install WordPress on DreamHost, follow these steps:
- Create a hosting account on DreamHost.
- Access your DreamHost panel and select the “Goodies” section.
- Click on “One-Click Installs” and then choose WordPress from the dropdown menu.
- Specify the domain or subdomain where you want to install WordPress.
- Fill in the necessary information, such as site title, username, and password.
- Review the installation options and click on “Install it for me now!”
Once the installation is completed, you can access your WordPress site by typing your domain or subdomain into a web browser. You can then log in with the username and password you specified during the installation process. Happy blogging!